
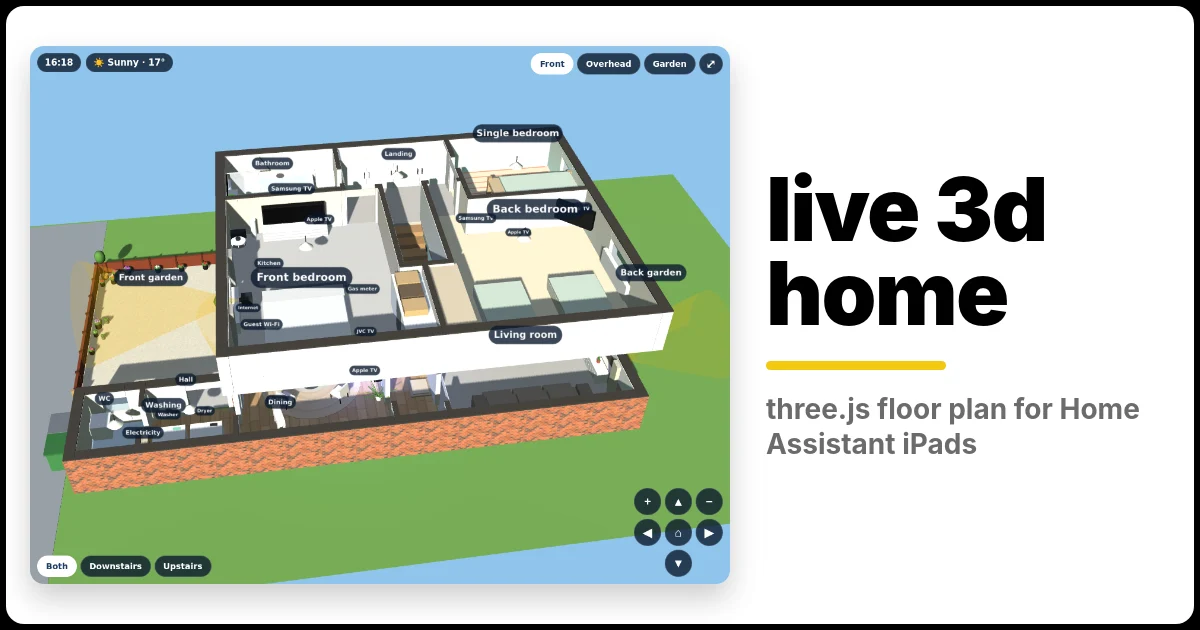
Most Home Assistant floor plans are a flat picture with some icons on top. I wanted something you could actually look into: a live 3D model of the house on the wall iPads, with the sun moving across it at the real time of day, the TVs glowing when they’re on, the washing machine drum spinning, and a visitor walking up the path when someone rings the doorbell. You can tap things in the model to control them.
This guide shows how I built my Home Assistant 3D floor plan with three.js as a custom card: how the house is modelled, how it follows your entities, and the tips that made it work on an iPad. My card is built for my own house, so I’ve also written a starter card you can download and set up with your own rooms in a few minutes.
Try the live demo
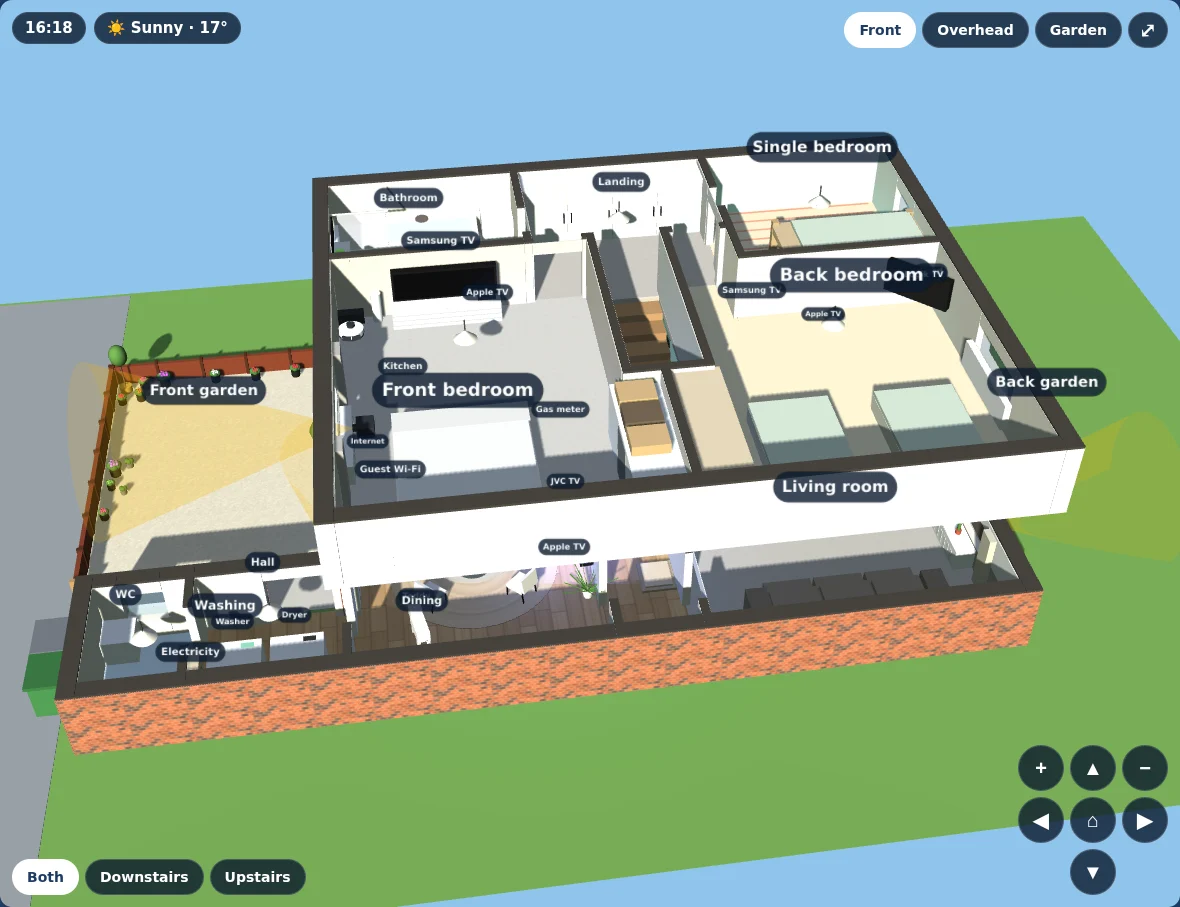
This is the real card running in your browser, with pretend data in place of my Home Assistant. Drag the time slider to watch the sun move across the house, switch the TVs, washer and robot hoover on, or ring the doorbell to see a visitor walk up the path. Drag to turn the model, scroll to zoom, and tap the ceiling lights to switch them on.
What the Home Assistant 3D floor plan does
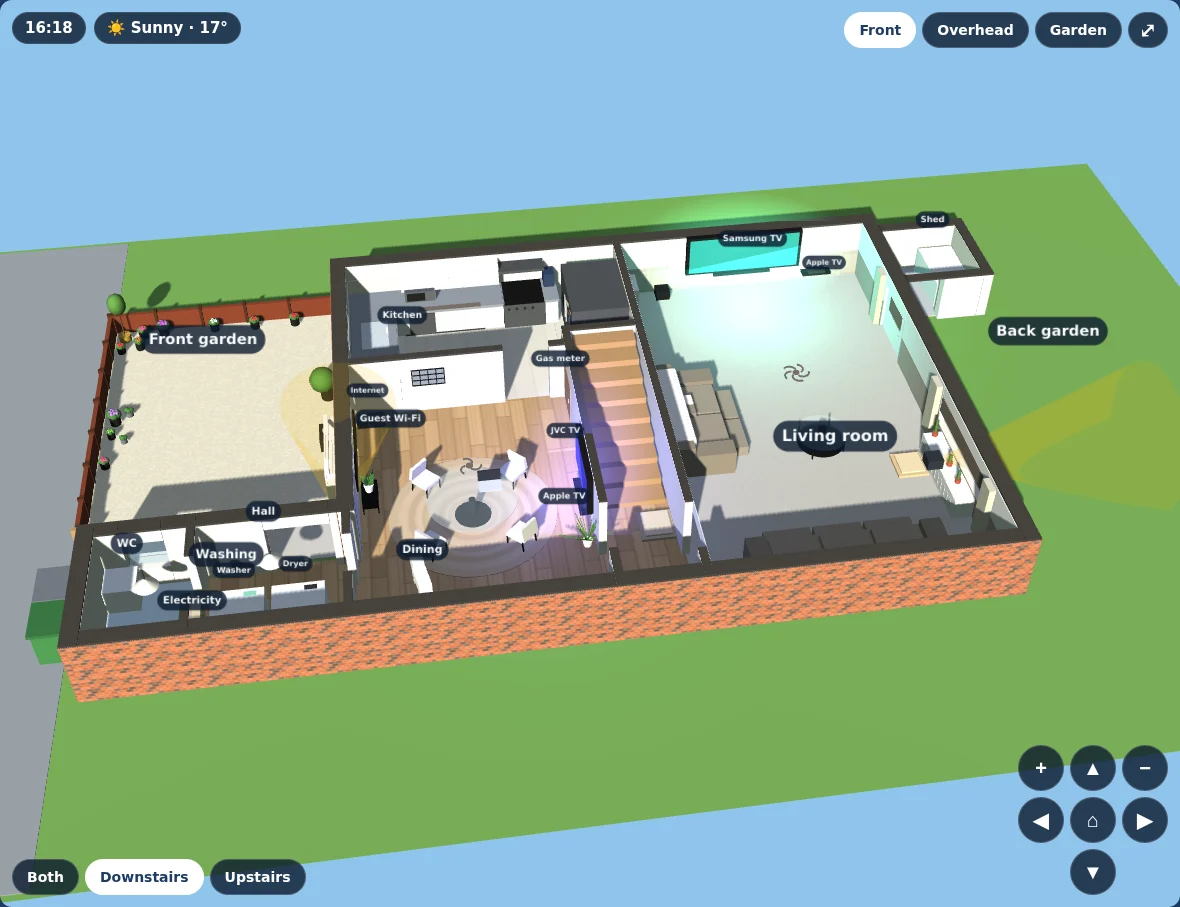
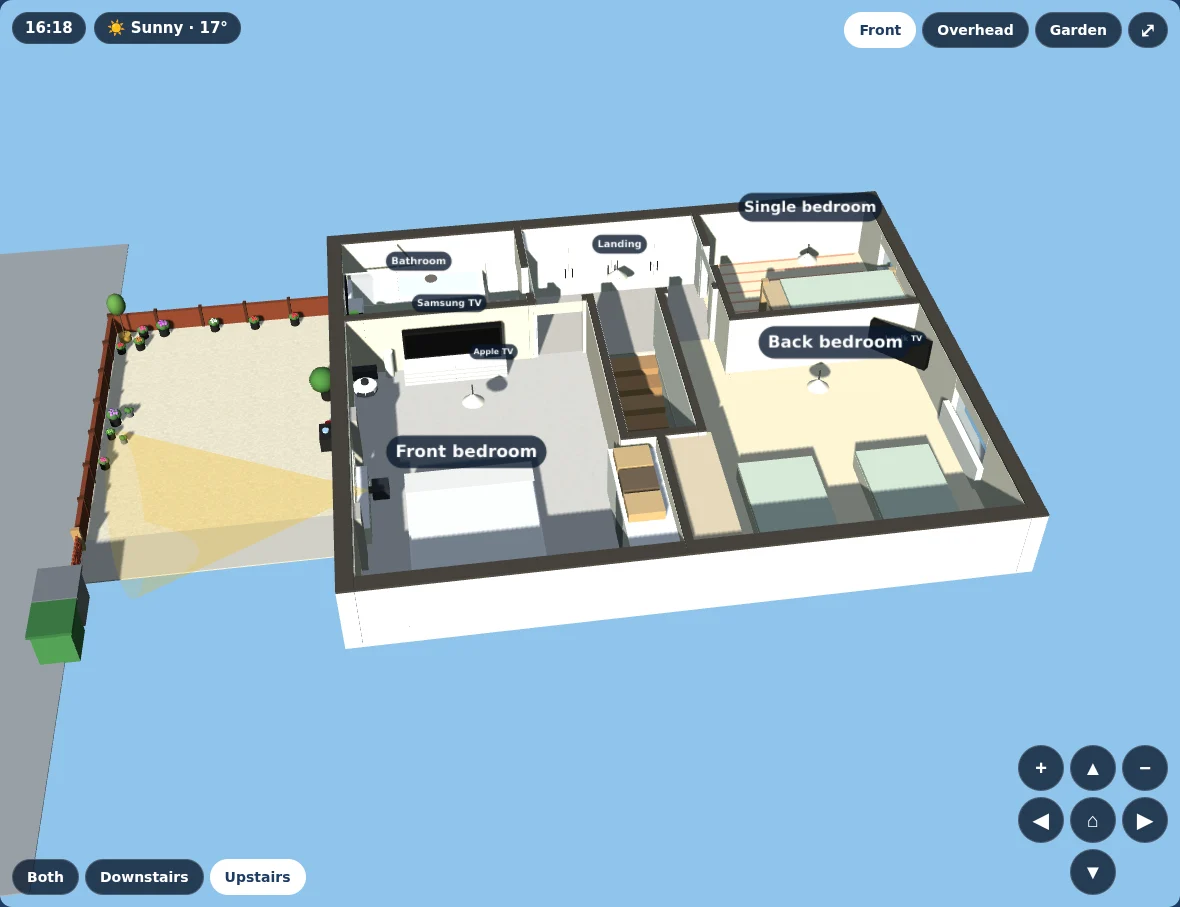
- Both floors, with the upstairs floating above the ground floor. Buttons switch between Both, Downstairs and Upstairs, and between Front, Overhead and Garden views. A small pad turns, tilts and zooms.
- The real sun. The sun’s position comes from Home Assistant’s
sun.sunentity, so shadows move round the house through the day, the sky turns orange at sunset, and stars come out at night. - TVs flicker and throw a coloured glow into the room while they’re on. When something is playing, its artwork floats out of the screen as a hologram.
- Washer and dryer drums spin while a cycle is running.
- Doorbell: when the doorbell camera sees a person, a visitor walks up the path and the gate opens.
- The dog wanders the dining room by day, naps in the sun, and goes to bed at night.
- Taps: tap a Samsung TV for a remote, an Apple TV or camera for its Home Assistant pop-up, or the washer to jump to the utility page.
- Weather is just a small pill next to the clock. I tried rain, snow and clouds in 3D and took them all out again (more on that below).
Here is each floor on its own:
Before you start
- Home Assistant, and a dashboard you can add a custom card to.
- A floor plan with rough measurements. A hand sketch with room sizes in centimetres is enough to start.
- Access to your Home Assistant
configfolder (Samba, the File Editor or Studio Code Server add-on, or SSH). - Some comfort with JavaScript if you want to go beyond the starter card. The starter needs none.
Step 1: Get three.js
three.js is the 3D library that does the drawing. Download two files and put them in a new folder, config/www/home3d/:
Tip: host them yourself. Loading three.js from a CDN works, but a wall tablet should keep working when the internet doesn’t. Files in www are served by Home Assistant at /local/, so the card loads them from your own server.
Tip: why the old r128 version? Newer three.js releases only ship OrbitControls as an ES module, which needs a bundler or an import map. r128 still has plain script versions of both files, so a Home Assistant card can load them with a simple <script> tag. For a floor plan you won’t miss anything newer.
Step 2: Get the starter card
The starter card is a single JavaScript file, home3d-starter-card.js. It builds a floor and four walls for each room you list, labels them, lights the scene from sun.sun, makes TVs glow while their media player is on, puts a glowing pendant in for each light, and opens the Home Assistant pop-up when you tap a TV or light.
It’s available as a download on my Buy Me a Coffee page. The zip has the card, the two three.js files from Step 1, the example config from Step 4 and install notes, ready to drop into config/www/home3d/. Buying it helps keep guides like this one coming. You can try the full card for free in the demo above.
Step 3: Register it as a dashboard resource
- Go to Settings → Dashboards, open the ⋮ menu → Resources. If you can’t see Resources, turn on Advanced mode in your user profile first.
- Click Add resource, enter
/local/home3d/home3d-starter-card.js?v=1and choose JavaScript module. - Refresh the browser.
Tip: every time you edit the file, change ?v=1 to ?v=2 and so on. iPads and the Home Assistant app cache the old file hard, and bumping the number is the only reliable way to get every screen onto the new version. I went through more than 40 versions of my card, and this was the step I forgot most often.
Step 4: Describe your rooms
Add a new view to your dashboard, set its View type to Panel (single card), and add a Manual card with your rooms. Measure from the top-left corner of the plan: x is how far across, y is how far down, w and d are the room’s width and depth, all in centimetres. TVs and lights take a position and an entity:
type: custom:home3d-starter-card
rooms:
  - { name: Kitchen,     x: 0,   y: 0,   w: 300, d: 250, color: "#d9d4c7" }
  - { name: Dining,      x: 300, y: 0,   w: 350, d: 250, color: "#c49a6c" }
  - { name: Hall,        x: 0,   y: 250, w: 200, d: 250, color: "#c49a6c" }
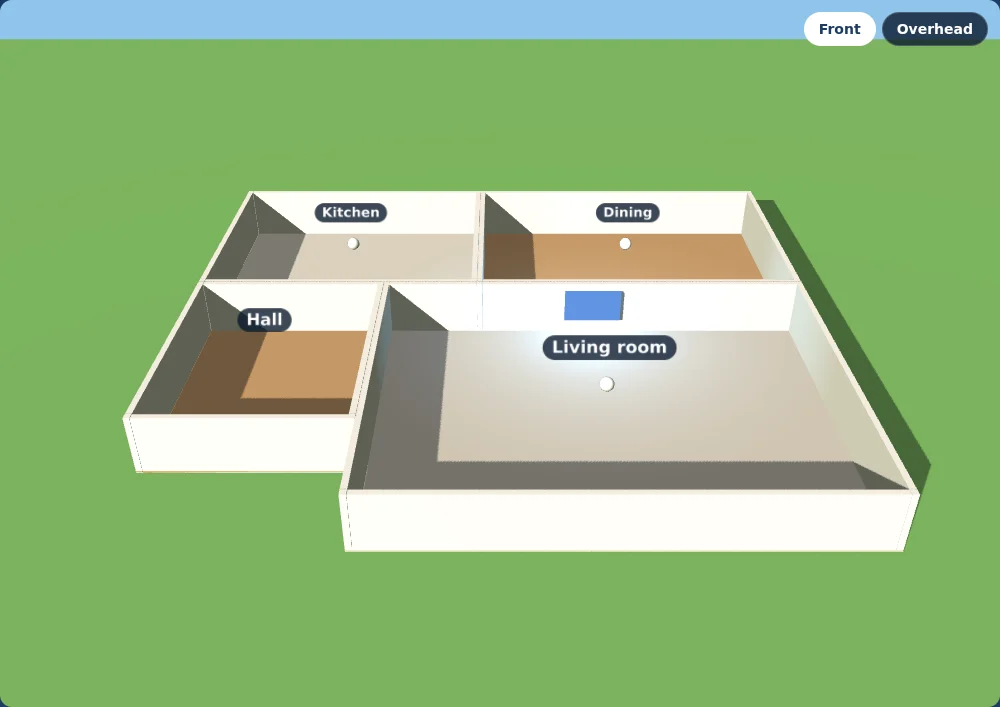
  - { name: Living room, x: 200, y: 250, w: 450, d: 350, color: "#cfc8bb" }
tvs:
  - { entity: media_player.living_room_tv, x: 425, y: 262 }
lights:
  - { entity: light.living_room, x: 425, y: 425 }
  - { entity: light.kitchen,     x: 150, y: 125 }
  - { entity: light.dining,      x: 475, y: 125 }
Change the entity IDs to your own. That gives you this, with the sun in its real position and the living room TV on:
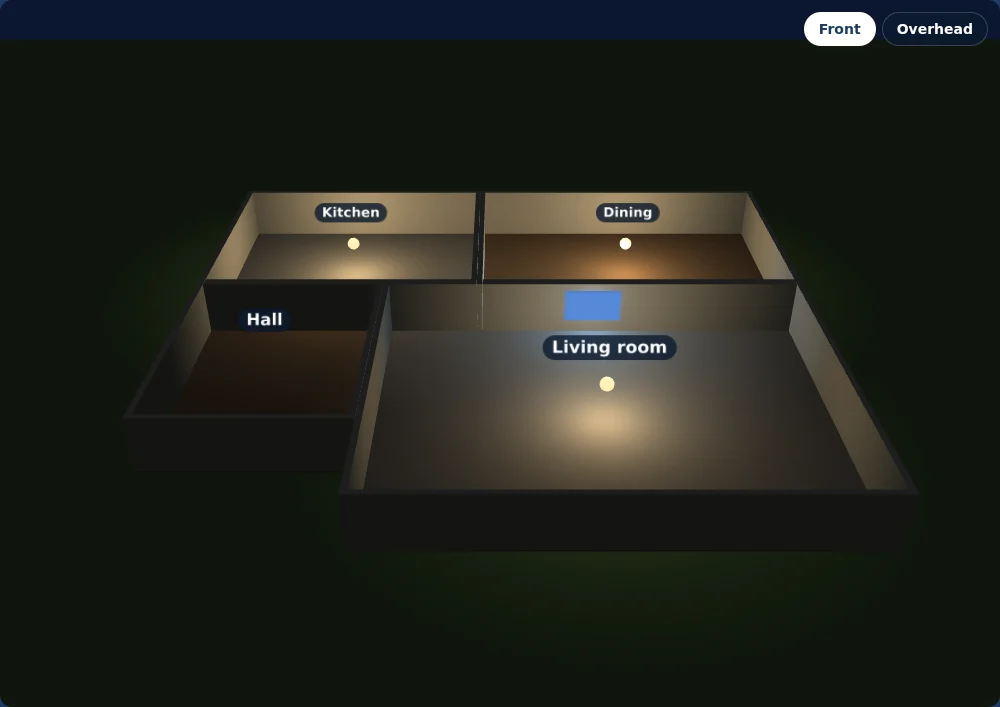
After sunset, with the lights on:
If the shadows fall the wrong way, your plan’s top edge probably isn’t north. Add north: 90 (or whatever angle your plan is turned by) to the card config.
Step 5: Make it look like your house
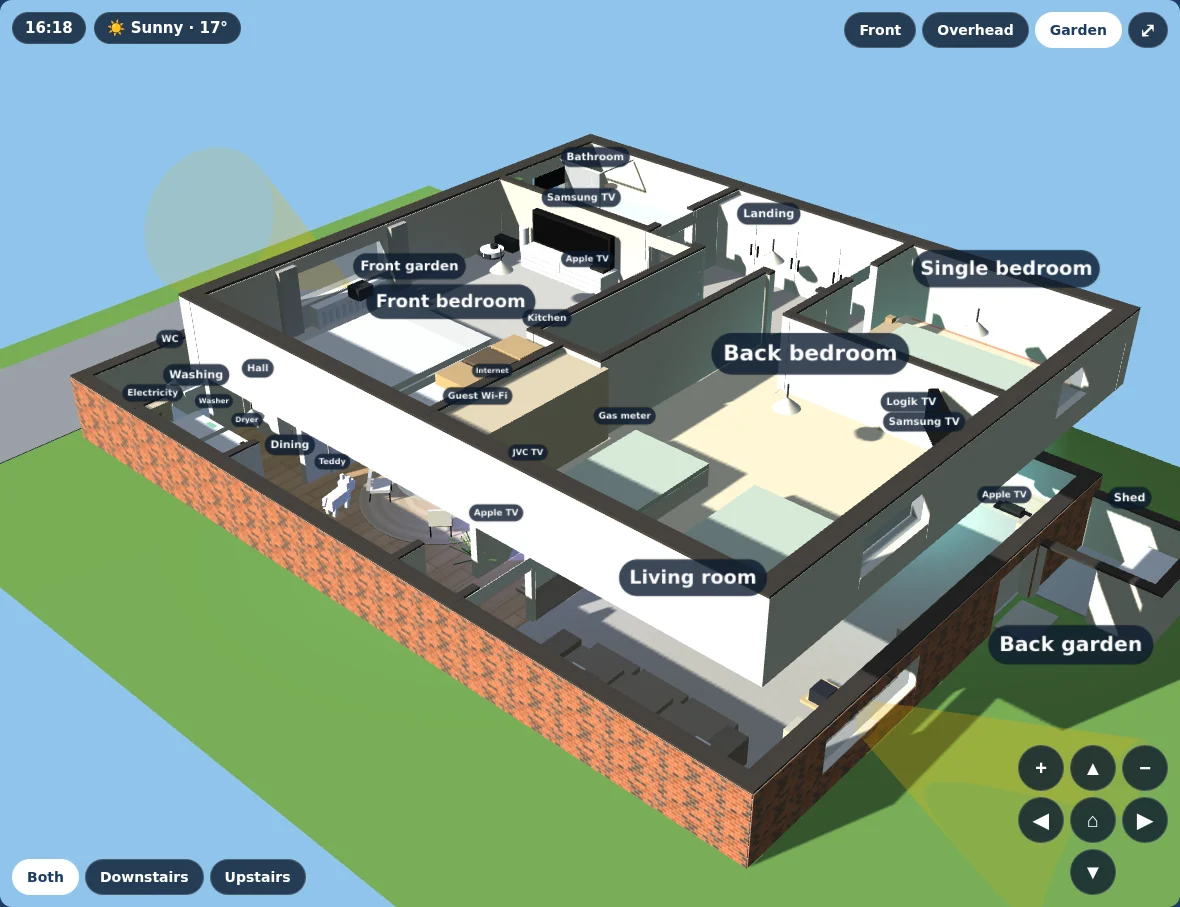
The starter gives you boxes. Everything in my card beyond that is the same idea repeated: add more boxes and cylinders in the right places, and change them when an entity changes. This is how I went from boxes to the house in the pictures:
- Start from the plan. I had already drawn the house as an SVG floor plan for a flat dashboard, so I used the same coordinates for the 3D model. Doors and windows are gaps left in the walls.
- Use photos for the details. I took a phone panorama of each room from the doorway and modelled what was in it: the round glass dining table and its four chairs, the wall-mounted TV, the sofas, the kitchen units and the fridge in its alcove. Most furniture is just two or three boxes. You don’t need a 3D modelling program.
- Sample the colours. Picking colours by eye made every room look wrong. I sampled the wall, floor and sofa colours from the photos and lightened them about 20%, because indoor phone photos come out darker than the room looks.
- Draw textures, don’t download them. The wooden floor, the brick outside walls and the kitchen tiles are drawn on a small HTML canvas in code and used as textures. Nothing to download, and they stay sharp on a retina screen.
- Glass is a transparent box. Windows and the glass table are boxes with a transparent material, so you can see through them.
The garden view looks across the back of the house:
Making it live
Home Assistant gives every card a hass object holding the state of every entity, and updates it whenever something changes. The card keeps a copy, and its animation loop reads what it needs on each frame:
- Sun:
sun.sun‘sazimuthandelevationattributes give the sun’s compass bearing and height. Turn them into an x, y, z position for a directional light, and three.js draws the shadows. The same elevation fades the sky from blue through orange to night. - On or off: anything that isn’t
off,standby,unavailableorunknowncounts as on. That one rule covers TVs, Apple TVs, lights and switches. - TV artwork: a media player’s
entity_pictureis the artwork of whatever is playing. Load it as a texture on a sprite, a flat picture that always faces the camera, and it floats in front of the TV. My Samsung TVs don’t report any artwork, so the card takes it from the Apple TV plugged into each one. - Events: for the doorbell visitor, the card notices when
binary_sensor.doorbell_person_occupancychanges from off to on, and starts the walk-up animation once. - Taps: a three.js raycaster finds what’s under your finger. The card stores an entity ID on each tappable object, then fires Home Assistant’s own
hass-more-infoevent to open its pop-up.
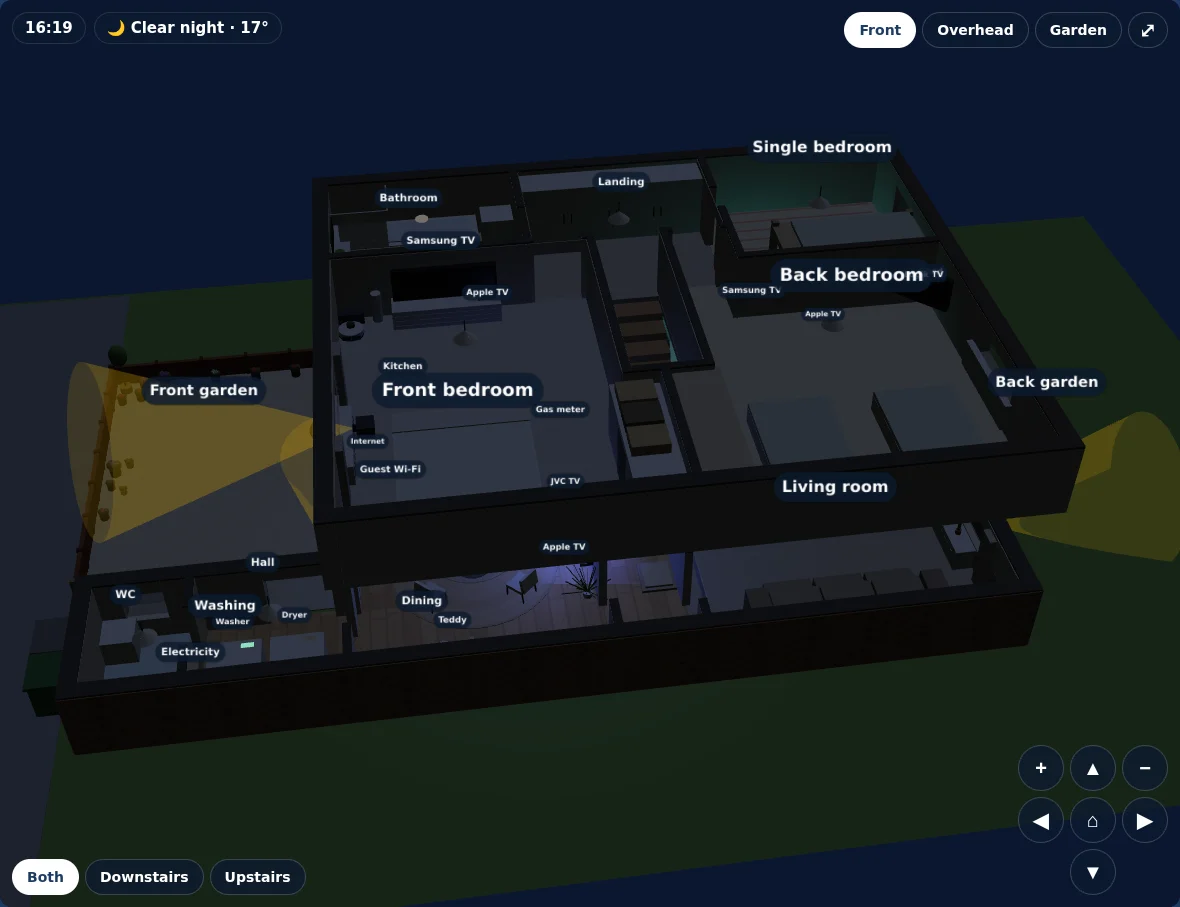
At night the sky goes dark and the stars come out, and the TV that’s on still glows:
Tips for wall-mounted iPads
- Only draw when it’s on screen. My iPad dashboard is a set of pages you swipe between, and all of them stay loaded. Without a check, the 3D page kept drawing 60 frames a second while you looked at the calendar. An
IntersectionObservertells the card when it’s visible, and the loop skips the drawing when it isn’t. It also stops when the browser tab is hidden. - Don’t let touch rotate the model. A one-finger drag to spin the house fought with the swipe between pages. The card turns touch rotation off and has buttons instead: preset views and a hold-to-repeat turn, tilt and zoom pad. A full-screen button covers the whole screen, and there one finger turns the model and two fingers zoom, because there’s no page swipe to fight.
- Cap the pixel ratio. iPads have retina screens, and drawing at their full resolution is a lot of work for the GPU.
renderer.setPixelRatio(Math.min(devicePixelRatio, 2))keeps it sharp without asking for more than the tablet can do smoothly. - Watch the lights. Every point light costs time on every frame. My model has 13 point lights in total, and that’s about as many as I’d want on an older iPad. Use one directional light for the sun and a hemisphere light for general brightness before adding more.
- Less is more. I added falling rain, snow, lightning and drifting clouds, and took every one of them out again. They made the house harder to read, and a small weather pill next to the clock said the same thing better. The things worth animating are the ones that tell you about your house.
- Test without the tablet. To check changes quickly, I put the card on a plain HTML page with a fake
hassobject and made screenshots with headless Chromium using its software renderer (--use-angle=swiftshader --enable-unsafe-swiftshader). That’s how the screenshots in this post were made, and it catches broken layouts before they reach the wall. - Keep the room data out of the code. My card has the house hard-coded, because I built it one room at a time. If you’re starting fresh, keep your rooms in the card config like the starter does, so you can change a room without touching JavaScript.
Troubleshooting
| Problem | Fix |
|---|---|
| “Custom element doesn’t exist: home3d-starter-card” | The resource isn’t registered, or the browser has the old list. Check Step 3, then do a hard refresh |
| The card is blank or stays dark | Check three.min.js and OrbitControls.js are in www/home3d/, open /local/home3d/three.min.js in a browser to make sure it loads, and look in the browser console for errors |
| Your edits don’t show up on the tablet | Bump the ?v= number on the resource |
| Shadows fall the wrong way | Set north: to the angle your plan is turned from north |
| The page swipe stops working on the 3D page | Leave controls.enableRotate off on swipe dashboards |
| It’s jerky on an older iPad | Fewer point lights, smaller shadow map (try 1024), and a pixel ratio of 1 |
Wrapping up
The 3D page has become the home page I actually look at: one glance tells me which TVs are on, whether the washing has finished and where the sun is. It started as the starter card in this post, boxes on a lawn, and grew one room at a time. Start with your rooms and the entities you care about most, put it on a tablet, and add details as you notice what’s missing.
New to Home Assistant? Start with my guide to installing Home Assistant with Docker Compose.
More Home Assistant guides: setting up an iPad or Galaxy Tab as a Home Assistant wall tablet, a washer and dryer card for Home Assistant and a Toyota car card.
Thank you
The idea came from LazyAdmin’s Home Assistant dashboard examples, which features a 3D floor plan made by Reddit user u/batubatu0. Thanks to both for the inspiration. Everything here is drawn by three.js, the free, open-source 3D library from Ricardo Cabello (mrdoob) and its contributors, under the MIT licence. If it’s useful to you, give the project a star on GitHub.