
For educational purposes only. This guide shows how to install self-hosted software on your own hardware. I don't condone piracy: only use these apps with media you own or have the right to use, and follow the law where you live. Back up your data first. Full disclaimer
Updated 16 November 2026 Tested with: qBittorrent 5.2.3
qBittorrent is a free, ad-free torrent client. Running it in Docker means it lives on your server or NAS, downloads around the clock, and you control it from a web page on any device in the house.
This guide sets up qBittorrent with Docker Compose in five short steps, either on its own or behind a VPN with Gluetun. It takes about 15 minutes.
On this page (11 sections)
- 1Watch: install qBittorrent with Docker Compose
- 2See how a torrent downloads
- 3What you need to set up qBittorrent with Docker Compose
- 4Step 1: Make your compose file
- 5Step 2: Start it
- 6Step 3: Sign in and set your password
- 7Step 4: Tell it where to save
- 8Step 5: Test it with a real torrent
- 9If something’s wrong
- 10Updating qBittorrent
- 11Frequently asked questions
Watch: install qBittorrent with Docker Compose
The video has subtitles at the bottom and no sound. It uses the simplest setup, one downloads folder and no VPN, recorded on a clean test install. The generator and steps below make the same thing, plus the optional Gluetun VPN and the /data folder layout that Radarr and Sonarr need.
See how a torrent downloads
Press Start download, then untick Port open and Through Gluetun to see what changes. Under the demo is the generator you’ll use in Step 1.
Open the generator full screen
What you need to set up qBittorrent with Docker Compose
- A computer or NAS running Docker. New to Docker? The Docker install guide covers Windows, Mac and Linux.
- Somewhere with space for downloads.
- Optional: a VPN subscription, if you want to run it through Gluetun.
Use it legally. qBittorrent is a download tool. What you download with it is up to you. Only download files you have the right to, such as Linux installers, open-source software and public-domain media. Downloading copyrighted material without permission is illegal in the UK and most other countries.
Step 1: Make your compose file
In the generator, choose With Gluetun or Without a VPN, fill in your details, and then on your server:
- Make a folder and go into it:
mkdir -p ~/qbittorrent && cd ~/qbittorrent - Save the generator’s compose.yaml there. Use the Download button, or run
nano compose.yaml, paste, then press Ctrl+O, Enter and Ctrl+X. - Do the same for .env. With Gluetun, paste your VPN key after
WIREGUARD_PRIVATE_KEY=.
PUID and PGID are the user qBittorrent runs as, so its files belong to you. Type id on your server and use the uid and gid numbers.
Step 2: Start it
Run the commands from the generator’s Commands tab. They create the folders, give them to your user, and start everything:
docker compose up -dWith Gluetun, give it about 30 seconds to connect. docker compose ps should show both containers as Up.
Step 3: Sign in and set your password
qBittorrent makes a temporary password the first time it starts. Get it with:
docker logs qbittorrent 2>&1 | grep -i passwordOpen http://YOUR-SERVER-IP:8080 in your browser and sign in as admin with that password. Then:
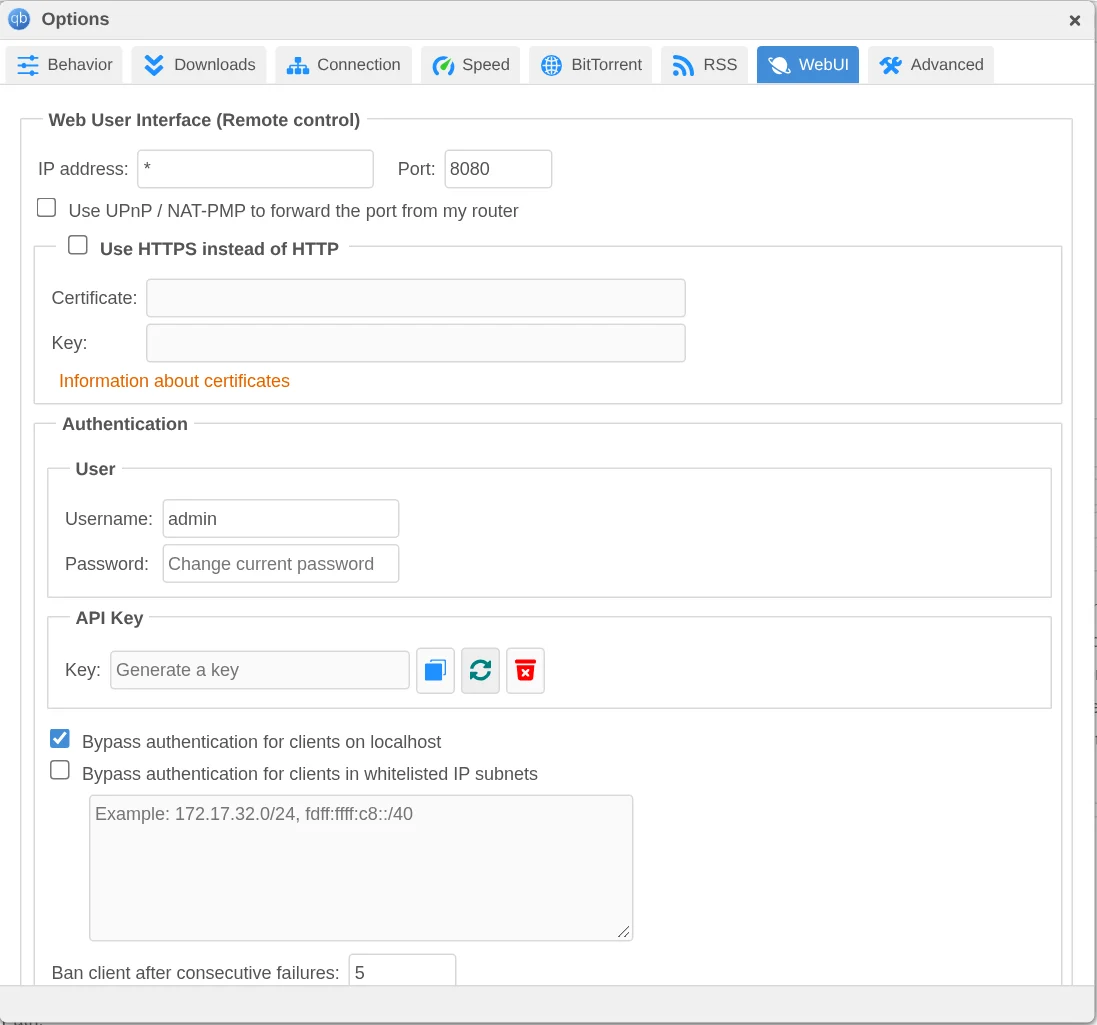
- Click the gear icon (Tools → Options) and open the WebUI tab.
- Under Authentication, type a new password.
- With Gluetun: tick Bypass authentication for clients on localhost. This lets Gluetun tell qBittorrent which port to use. Skip it if you chose “Login scripts” in the generator.
- Scroll down and click Save.
Step 4: Tell it where to save
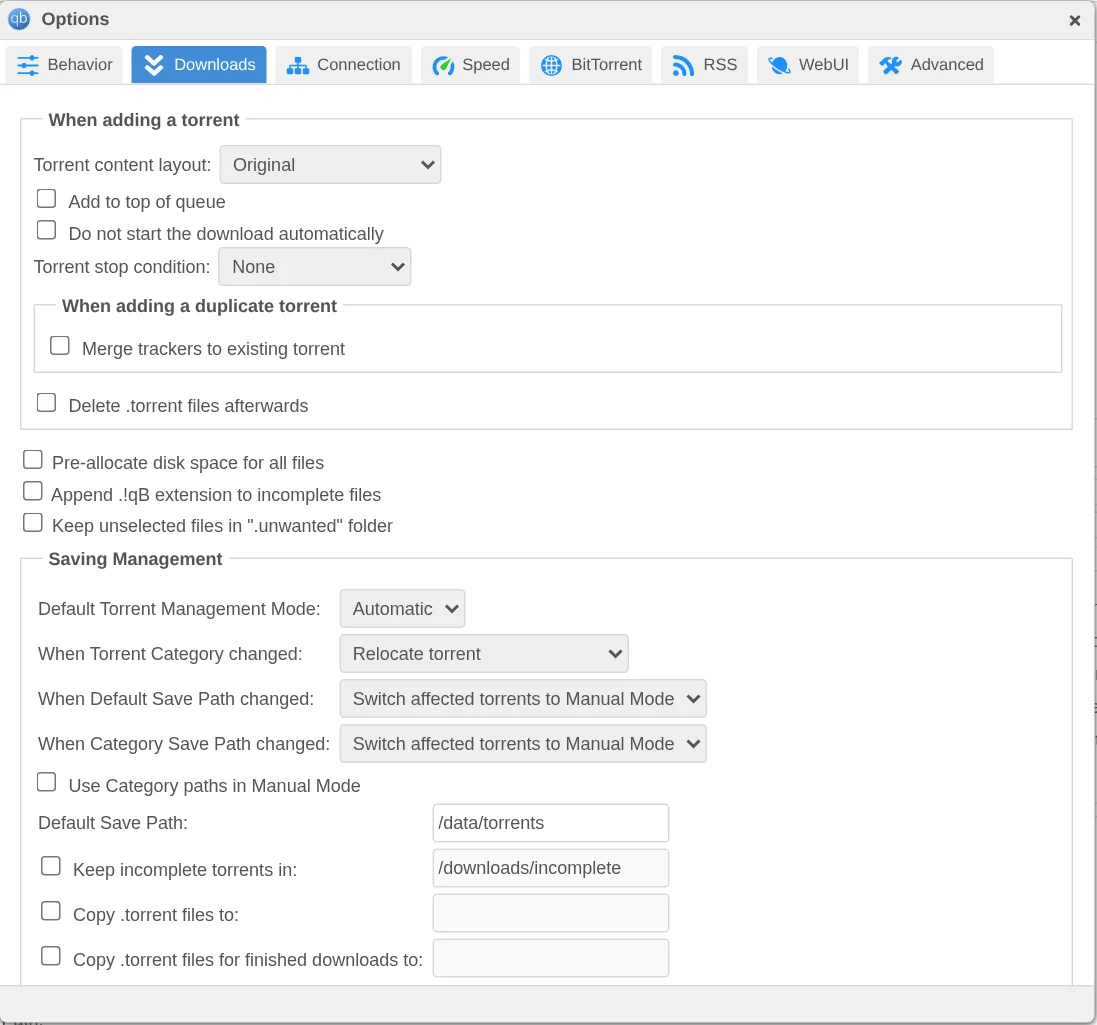
Still in Options, open the Downloads tab:
- Set Default Torrent Management Mode to Automatic.
- Set Default Save Path to
/data/torrents. - Click Save.
/data/torrents is the folder inside the container. The generator connected it to the data folder on your server, so finished downloads appear there. “Automatic” mode puts each category in its own subfolder, for example /data/torrents/movies, which is what Radarr and Sonarr expect later.
Step 5: Test it with a real torrent
Debian’s free installer is a good, legal test, and it’s what the video uses:
- Go to cdimage.debian.org/debian-cd/current/amd64/bt-cd and copy the link to the netinst.iso.torrent file.
- In qBittorrent, click File → Add Torrent Link, paste it and click Download.
- qBittorrent shows the torrent and its options. Leave them as they are and click Add Torrent at the bottom.
- It should start within a few seconds, and you’ll see peers connect under the torrent’s Peers tab.
With Gluetun, also check two things. First, that qBittorrent is using the VPN. This should show the VPN’s IP, not your home’s:
docker exec qbittorrent curl -s https://ipinfo.io/ipSecond, if your VPN has port forwarding, that qBittorrent got the port. Compare the number from this command with Options → Connection → Port used for incoming connections. They should match.
docker logs gluetun 2>&1 | grep -i "port forwarded"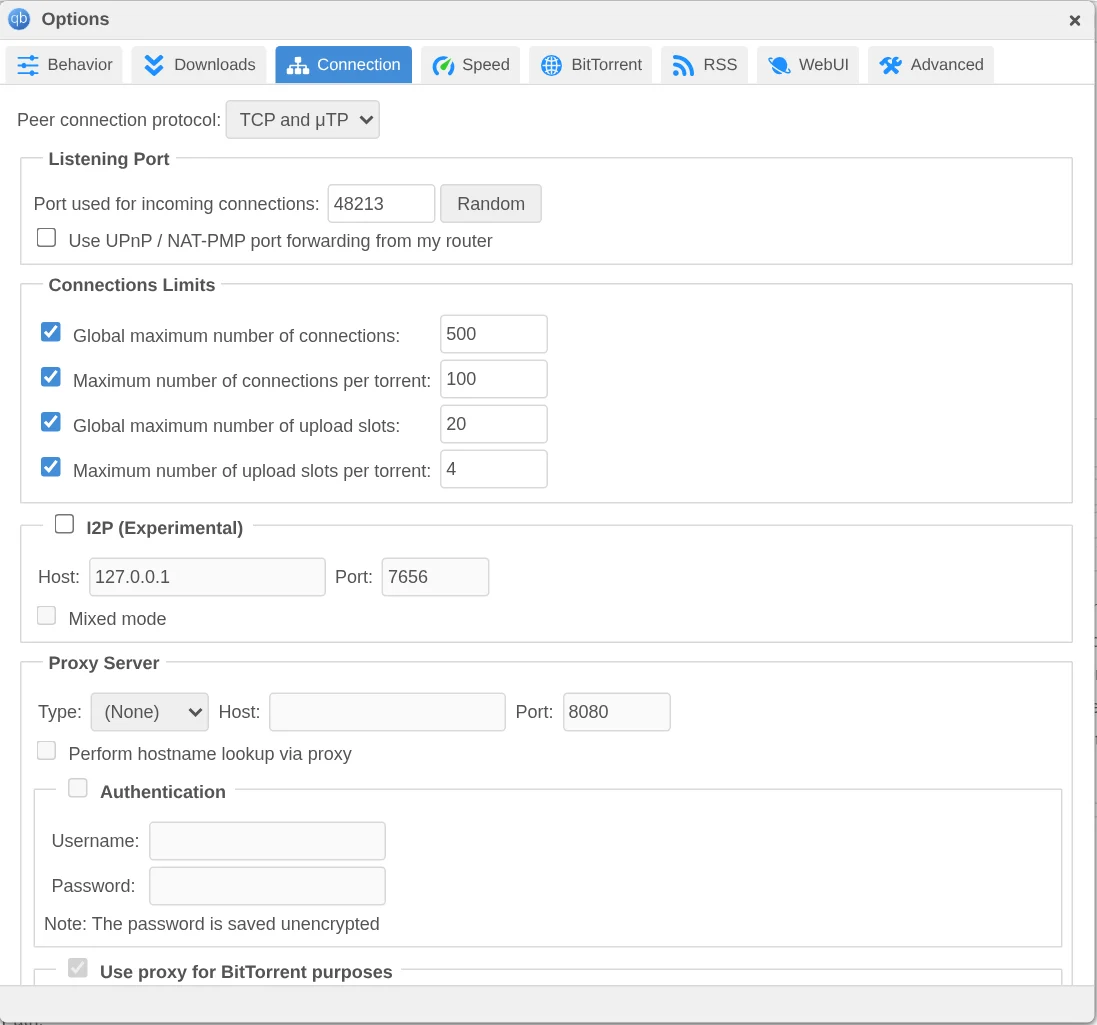
That’s it, qBittorrent is up and running. 🎉
If something’s wrong
- The web page won’t open. Check the container is running with
docker compose ps. With Gluetun, the port has to be under gluetun’sports:(the generator does this), and Gluetun must be healthy. - “Unauthorized” or the password doesn’t work. Run the
grep -i passwordcommand again. After a restart, qBittorrent makes a new temporary password until you’ve set your own. - Downloads say “Permission denied” or stay at 0 B. The data folder doesn’t belong to your PUID/PGID. Run the
chownline from the Commands tab again. - The port in Options doesn’t match Gluetun’s. The localhost tick from Step 3 is missing, or with the login scripts, the password in
.envdoesn’t match qBittorrent’s. - Torrents are slow. Without a VPN, forward the torrent port (6881 by default) on your router. With a VPN, choose one with port forwarding, such as ProtonVPN Plus, PIA or AirVPN.
Updating qBittorrent
cd ~/qbittorrent
docker compose pull && docker compose up -d
Your settings and downloads are kept, because they live in the config and data folders, not in the container.
🧰 What I use
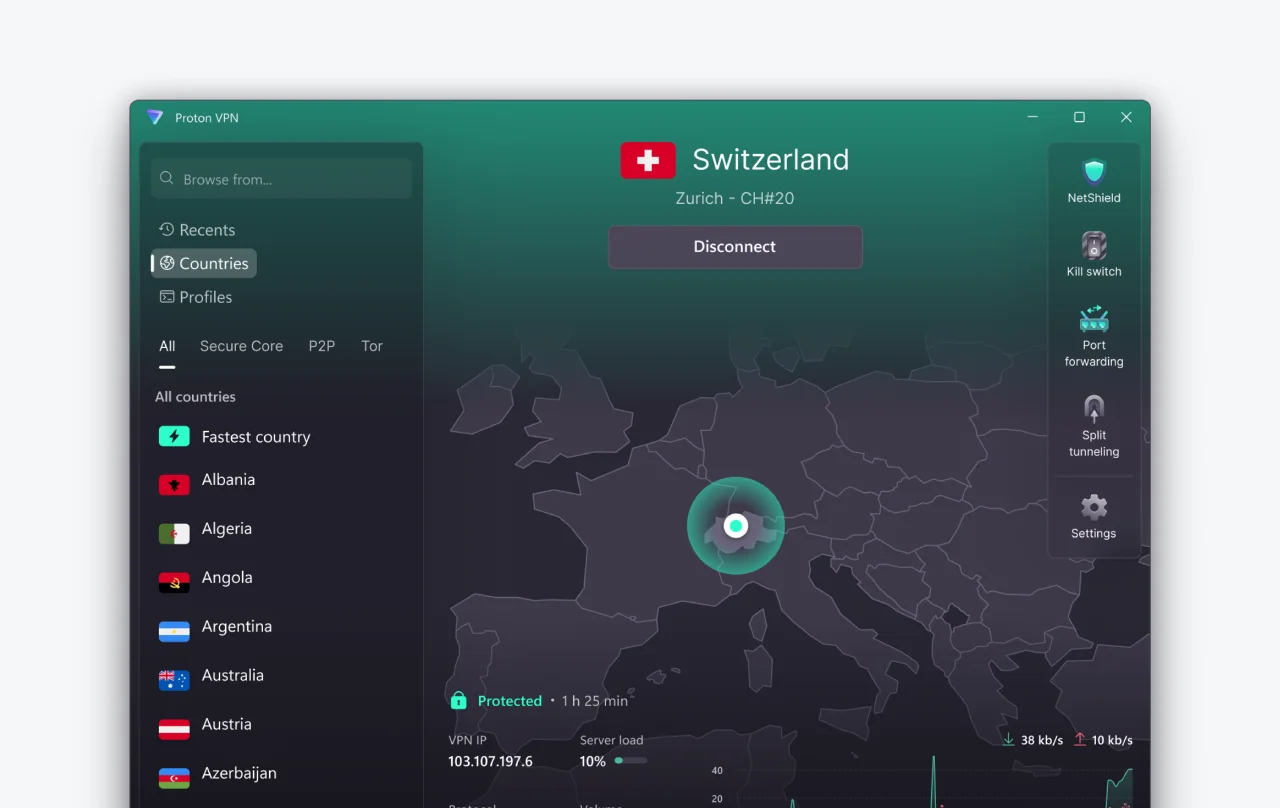
Proton VPN: works with Gluetun over WireGuard. Its port forwarding gives qBittorrent an open port, so it can make more connections.
This is an affiliate link: if you sign up through it, I may earn a commission, at no extra cost to you. Use a VPN for privacy, and only download what you have the right to.
Frequently asked questions
Do I need a VPN for qBittorrent?
It's optional. The generator on this page makes a compose file either way. Behind Gluetun, other peers see your VPN's IP address instead of your home one, and a VPN with port forwarding keeps speeds up.
What is the default qBittorrent password in Docker?
There isn't a fixed one. qBittorrent prints a temporary password in the container log on each start until you set your own. Find it with docker logs qbittorrent | grep -i password.
Why do my downloads say Permission denied or stay at 0 B?
The data folder doesn't belong to the PUID/PGID in your .env. Run the chown line from the generator's Commands tab again.
Why are my torrents slow?
Other peers can't connect to you. Without a VPN, forward the torrent port (6881 by default) on your router. With a VPN, pick one with port forwarding, such as ProtonVPN Plus, PIA or AirVPN.
Thank you
qBittorrent is built by volunteers and is free and open source. You can support it at qbittorrent.org/donate. Thanks also to LinuxServer.io, who make the Docker image this guide uses.
Next in this series: Prowlarr, Radarr and Sonarr, to find and download films and TV for you automatically.
If this guide helped you, consider buying me a coffee. It helps keep guides like this one coming.
☕Buy me a coffeeGet new guides by email
About one email a month: new step-by-step guides and card releases. No spam, unsubscribe any time.
 spikey1965