
Home Assistant is the free, open-source hub that ties all your smart home kit together: lights, TVs, cameras, heating, even the washing machine. The easiest way to run it on a computer you already have, like a Raspberry Pi, a mini PC or a home server, is in Docker. You get one small config file, updates take a single command, and it can’t clash with anything else on the machine.
This guide shows you how to install Home Assistant with Docker Compose, from nothing to a working setup in about 15 minutes. Every step has the exact commands to copy, and screenshots of what you’ll see.
What you need to install Home Assistant with Docker Compose
- A computer running Linux that stays on: a Raspberry Pi 4 or 5, an old laptop, a mini PC or a NAS. 2 GB of RAM is plenty to start.
- A way to type commands on it, either directly or over SSH.
- About 15 minutes.
Docker or Home Assistant OS? If you want to give a whole device to Home Assistant, Home Assistant OS is simpler and includes the add-on store. Docker (Home Assistant calls it Home Assistant Container) is the right choice when the machine also does other things, like running Plex or other apps. Everything in Home Assistant itself works the same either way. The one difference is there’s no add-on store, so extras like Mosquitto or Zigbee2MQTT run as their own Docker containers instead.
Step 1: Install Docker
If Docker is already installed, skip to Step 2. You can check with docker --version.
Docker’s official install script works on Debian, Ubuntu, Raspberry Pi OS and most other Linux systems:
curl -fsSL https://get.docker.com | sudo shThen let your user run Docker without typing sudo every time, and log out and back in so it takes effect:
sudo usermod -aG docker $USERCheck it worked:
docker --version
docker compose version
Both should print a version number. If docker compose isn’t found, you have an old version: run the install script again.
Step 2: Make a folder for Home Assistant
Everything Home Assistant knows (your devices, automations and dashboards) lives in one folder. Keep it somewhere easy to back up:
mkdir -p ~/homeassistant/config
cd ~/homeassistant
Step 3: Create the compose file
Create a file called compose.yaml in that folder:
nano compose.yamlPaste this in, changing Europe/London to your own time zone:
services:
  homeassistant:
    container_name: homeassistant
    image: ghcr.io/home-assistant/home-assistant:stable
    volumes:
      - ./config:/config
      - /etc/localtime:/etc/localtime:ro
      - /run/dbus:/run/dbus:ro
    environment:
      TZ: Europe/London
    network_mode: host
    privileged: true
    restart: unless-stopped
Save with Ctrl+O, Enter, then exit with Ctrl+X.
What each part does:
image: …:stableis the official Home Assistant image, always the latest stable release../config:/configkeeps your settings in the folder you just made, so they survive updates.network_mode: hostputs Home Assistant on your home network directly. This matters: without it Home Assistant can’t discover your TVs, speakers and smart plugs automatically./run/dbusandprivileged: truelet it use Bluetooth and USB devices such as Zigbee sticks.restart: unless-stoppedstarts it again after a reboot or power cut.
Step 4: Start Home Assistant
docker compose up -dThe first time, Docker downloads the image (about 2 GB), which can take a few minutes. Watch it start up with:
docker compose logs -fWhen the messages slow down, press Ctrl+C to stop watching. Home Assistant keeps running in the background.
Step 5: Open Home Assistant and create your account
On any computer or phone on the same network, open a browser and go to:
http://YOUR-SERVER-IP:8123Replace YOUR-SERVER-IP with your server’s address. If you don’t know it, run hostname -I on the server and use the first number it shows. The first start can take a minute or two, so refresh if the page doesn’t load straight away.
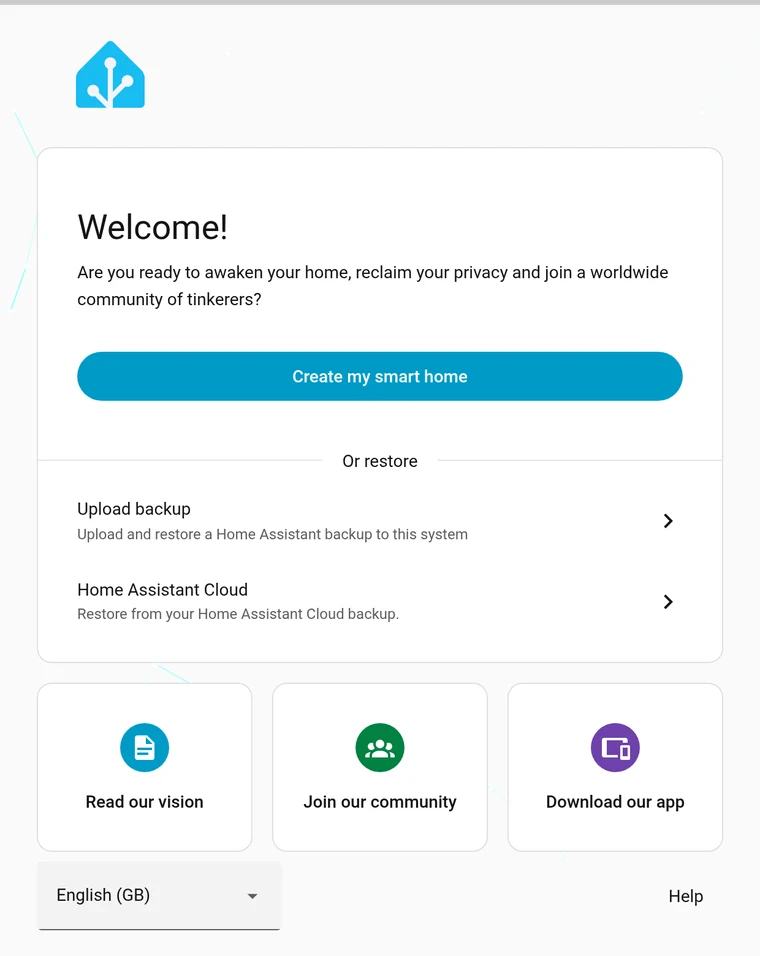
You’ll see the welcome screen. Click Create my smart home:
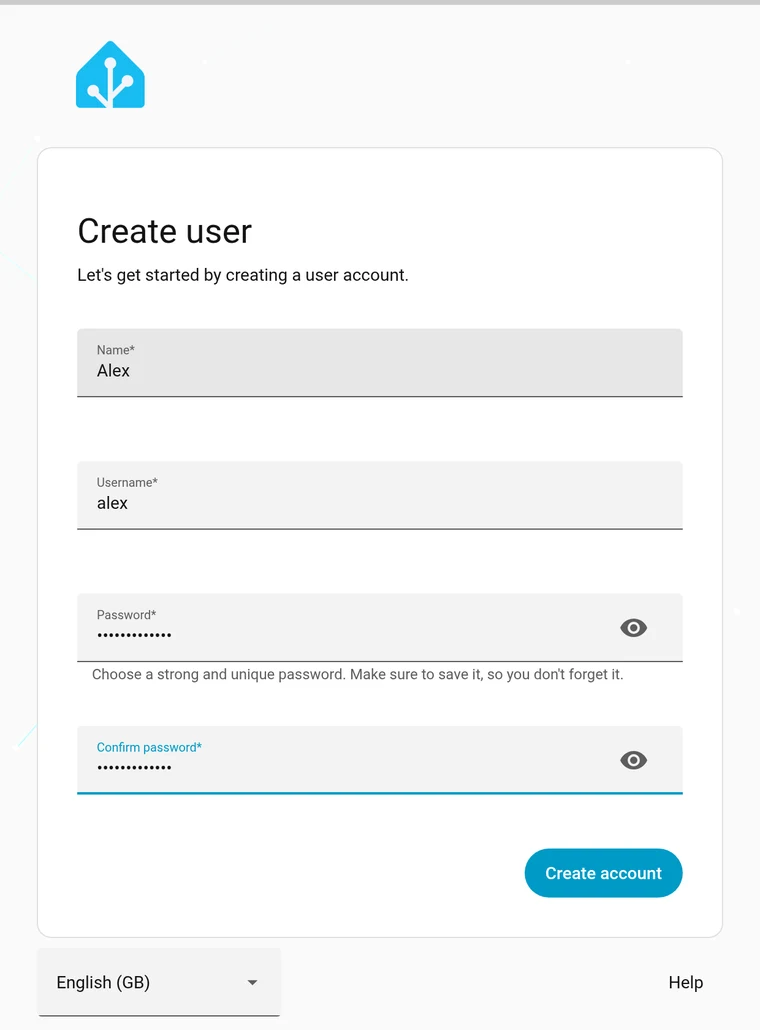
Create your account. This is the owner account, so pick a strong password and save it in your password manager:
Step 6: Location, country and privacy
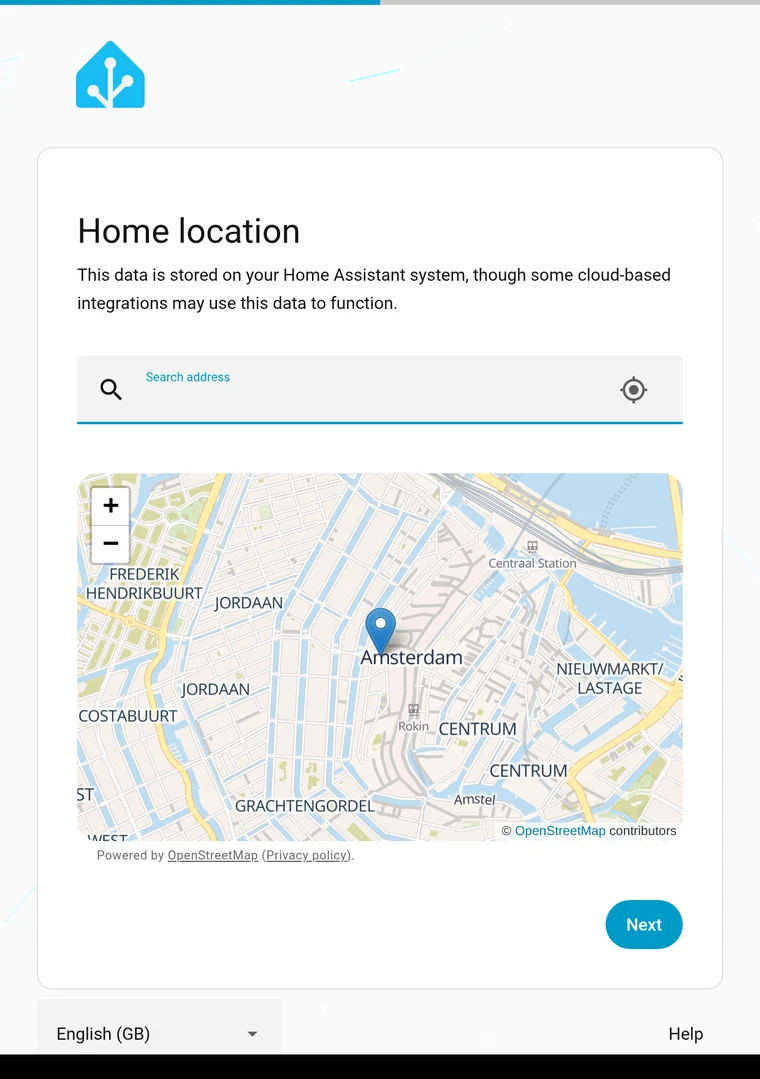
Set your home’s location by searching for your address or dragging the pin. Home Assistant uses it for sunrise and sunset times, the weather and presence detection. It stays on your server.
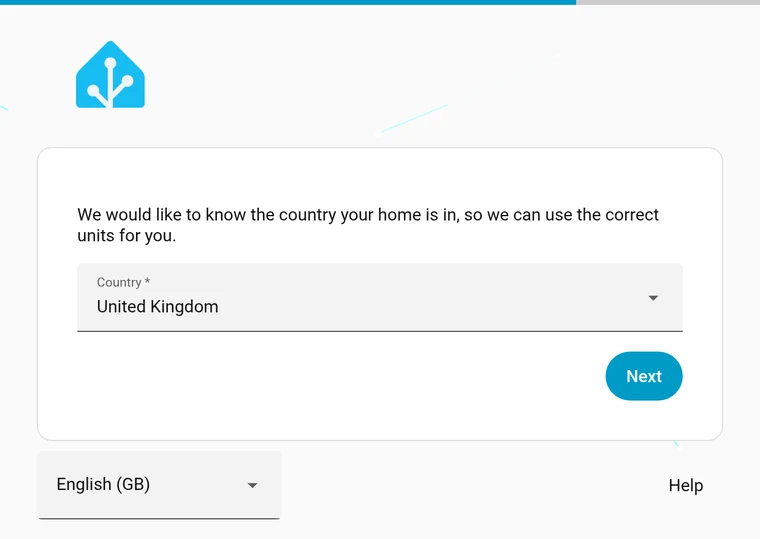
Pick your country so it uses the right units and currency:
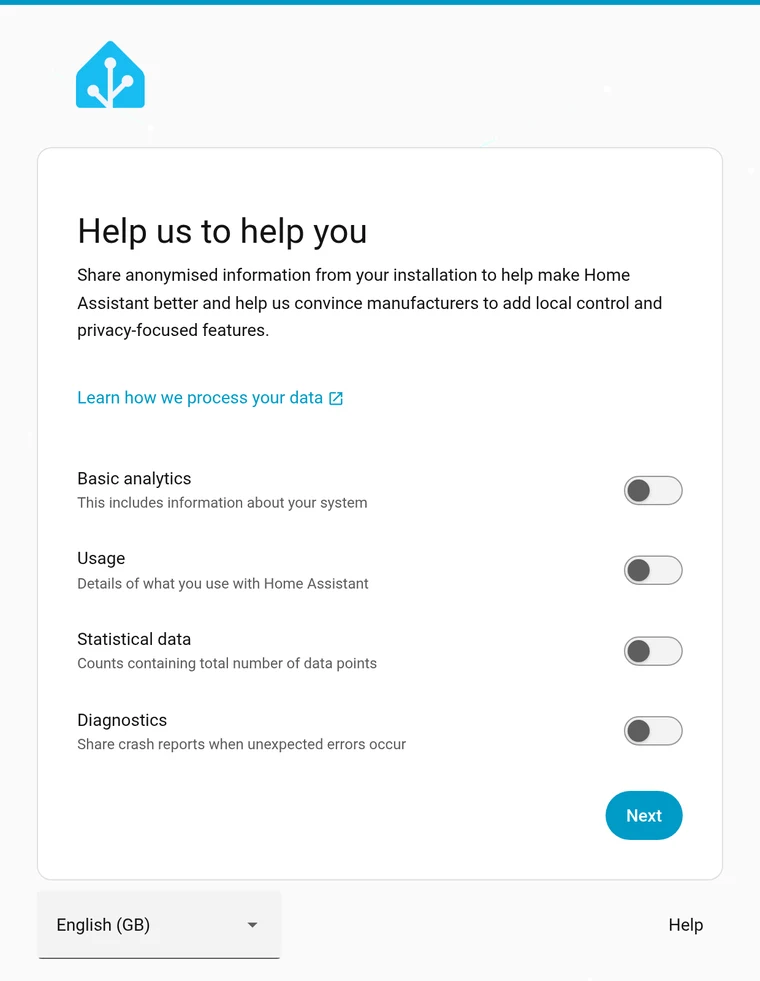
Choose what anonymous data, if any, to share with the Home Assistant team. Everything is off by default, and any choice is fine:
Click Next, then Finish. You’re in.
Step 7: Add your first devices
Go to Settings → Devices & services. Because of the host networking in Step 3, Home Assistant will have started finding things on your network already, and they appear at the top as Discovered. Click Add on each one you want.
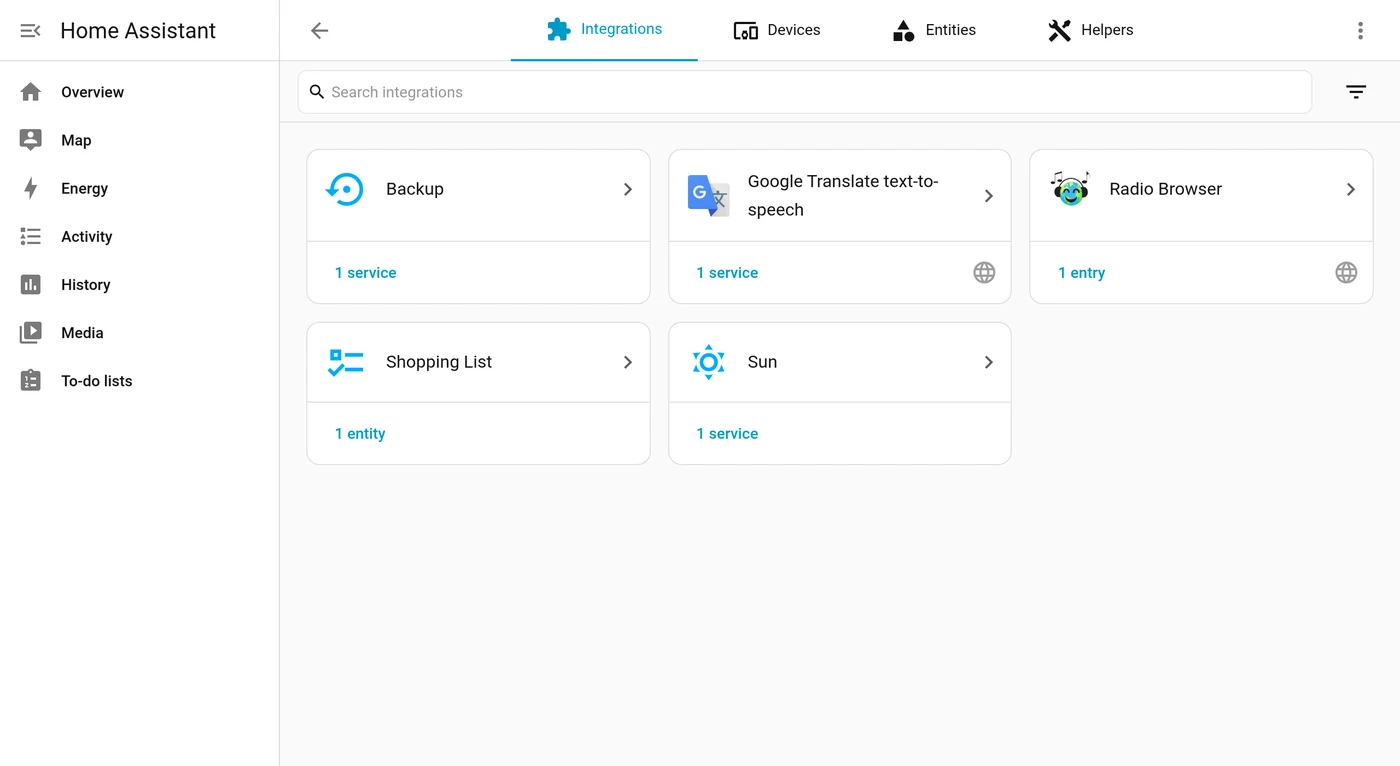
For anything not found automatically, click Add integration and search for the brand: Philips Hue, Sonos, Samsung TV, Ring, Tado and thousands more.
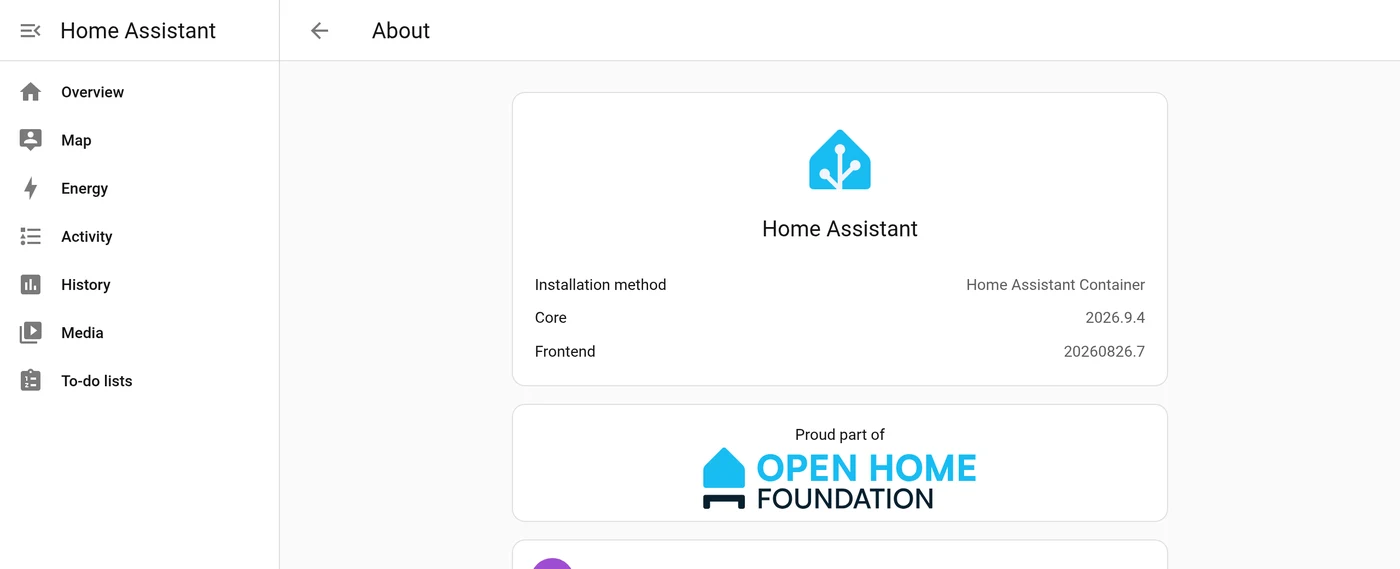
To check it’s running as a Docker install, go to Settings → About. It shows Home Assistant Container:
Updating Home Assistant
A new version comes out every month. To update, go to your Home Assistant folder and run:
cd ~/homeassistant
docker compose pull
docker compose up -d
Your settings are untouched because they live in the config folder. Take a backup first (below) so you can go back if a new version doesn’t suit you.
Backing up
Use Settings → System → Backups to make backups from inside Home Assistant and set them to run automatically. Copy them off the server now and then, to another computer or cloud storage. A backup that’s only on the same disk won’t help if that disk dies.
You can also stop Home Assistant and copy the whole config folder:
cd ~/homeassistant
docker compose stop
tar czf ha-backup-$(date +%F).tar.gz config
docker compose start
Useful commands
Run these from your ~/homeassistant folder:
docker compose psshows whether it’s running.docker compose logs --tail 100shows the last 100 log lines.docker compose restartrestarts Home Assistant.docker compose downstops and removes the container. Your config folder stays.
Troubleshooting
- The page won’t load. Give it two minutes on the first start, then check
docker compose pssays it’s running. Make sure you usedhttp://(not https) and port8123. If the server has a firewall, allow port 8123: on Ubuntu that’ssudo ufw allow 8123/tcp. - Nothing gets discovered. Check
network_mode: hostis in your compose file. Without it Home Assistant sits on Docker’s private network and can’t see your devices. - “permission denied” running docker. You haven’t logged out and back in since Step 1, so the group change hasn’t taken effect yet.
- A USB stick (Zigbee, Z-Wave) isn’t found. Plug it in before starting Home Assistant, then run
ls /dev/serial/by-id/on the server and use that path when the integration asks for the device. - Port 8123 is already in use. Something else is using it. Find out what with
sudo ss -tlnp | grep 8123.
What next?
Once your devices are in, the fun part is the dashboard. Here are some of the cards I’ve built for mine:
- How to set up a Home Assistant wall tablet (iPad or Galaxy Tab)
- A live 3D floor plan of the house
- A washer and dryer card with a progress ring
- A Toyota car card
Thank you
Home Assistant is built by thousands of volunteers and the team at the Open Home Foundation, and it’s free. If it becomes the heart of your home like it has mine, consider supporting them with Home Assistant Cloud.
If this guide helped you, consider buying me a coffee. It helps keep guides like this one coming.