
For educational purposes only. This guide shows how to install self-hosted software on your own hardware. I don't condone piracy: only use these apps with media you own or have the right to use, and follow the law where you live. Back up your data first. Full disclaimer
Updated 16 November 2026 Tested with: Tdarr 3.08.00
Tdarr shrinks your media library while you sleep. It goes through your films and TV shows, converts anything in the older H.264 format to H.265 (HEVC), and swaps the smaller file in under the same name. Most files come out at about half the size, and Radarr, Sonarr and Plex carry on as if nothing happened.
This guide sets up Tdarr with Docker Compose in six short steps. Setup takes about 20 minutes, then Tdarr works through your library on its own.
On this page (13 sections)
- 1Watch: install Tdarr with Docker Compose
- 2See how Tdarr handles a file
- 3What you need to set up Tdarr with Docker Compose
- 4Step 1: Make your compose file
- 5Step 2: Create a library
- 6Step 3: Check the plugins
- 7Step 4: Scan the library
- 8Step 5: Start a worker
- 9Step 6: Check the results
- 10Optional: health checks
- 11If something’s wrong
- 12Updating Tdarr
- 13Frequently asked questions
Watch: install Tdarr with Docker Compose
The video has subtitles at the bottom and no sound. It was recorded on a clean test install of Tdarr 3.08 with the default plugin stack, which converted the test film from 55 MB to 35 MB. The video uses simple folder names (/media, /temp); the generator below uses the /data layout that Radarr and Sonarr need. The test film is Big Buck Bunny © Blender Foundation, peach.blender.org, licensed under Creative Commons Attribution 3.0.
See how Tdarr handles a file
Pick a file and press Process to watch Tdarr check it, transcode it, check the new size and swap it in. Try the GPU worker, and switch Still seeding on and off to see what happens to your disk space. Under the demo is the generator you’ll use in Step 1.
Open the generator full screen
What you need to set up Tdarr with Docker Compose
- A computer or NAS running Docker. New to Docker? The Docker install guide covers Windows, Mac and Linux.
- Your films and shows in one data folder, the same one Radarr and Sonarr use.
- Ideally a graphics card. An NVIDIA card (even an old GTX 1660) is many times faster than the CPU. Without one, Tdarr still works, just slowly.
Step 1: Make your compose file
In the generator, pick your graphics card and use the same data folder as Radarr and Sonarr. For the Transcode cache, pick a folder on a fast disk with plenty of free space (at least twice your biggest file), and not inside your media folder. Then:
mkdir -p ~/tdarr && cd ~/tdarrSave compose.yaml and .env there, and run the commands from the Commands tab. Tdarr opens at http://YOUR-SERVER-IP:8265. Tdarr 3.08 and later first ask you to create a local account: choose a username and password and click Create. Then close the welcome pop-ups.
Step 2: Create a library
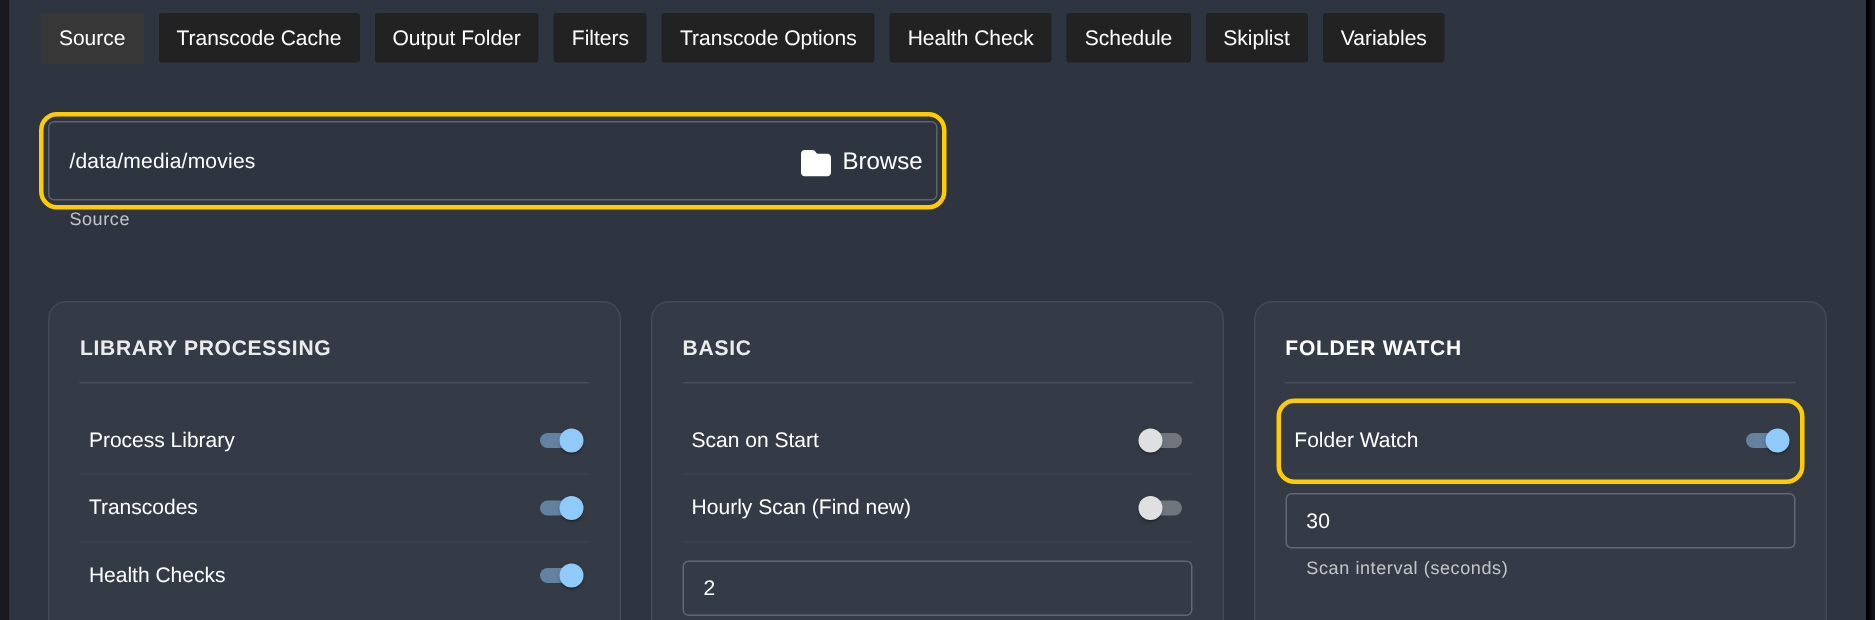
- Go to Libraries and click Library +. Click the name and call it
Movies. - On the Source tab, set the folder to
/data/media/movies. - Turn on Folder Watch, so new films are picked up as soon as Radarr adds them. It’s off by default.
- On the Transcode Cache tab, set the folder to
/temp.
Tdarr saves as you go. There’s no Save button.
336 hours for 14 days).Step 3: Check the plugins
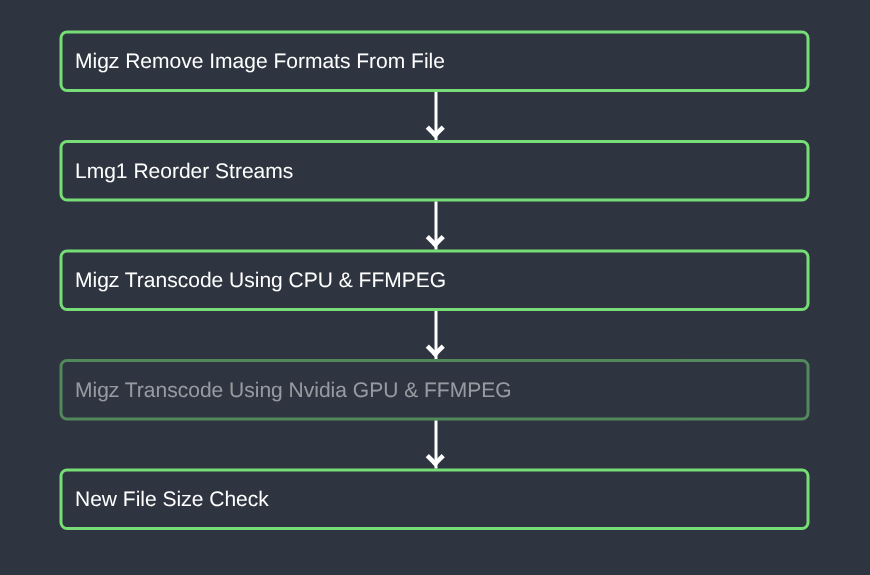
Open the Transcode Options tab. The default Classic Plugin Stack is ready to use. In order, it removes embedded images, puts the streams in the right order, converts the video to HEVC (leaving audio and subtitles alone), and checks the new file isn’t suspiciously small or big.
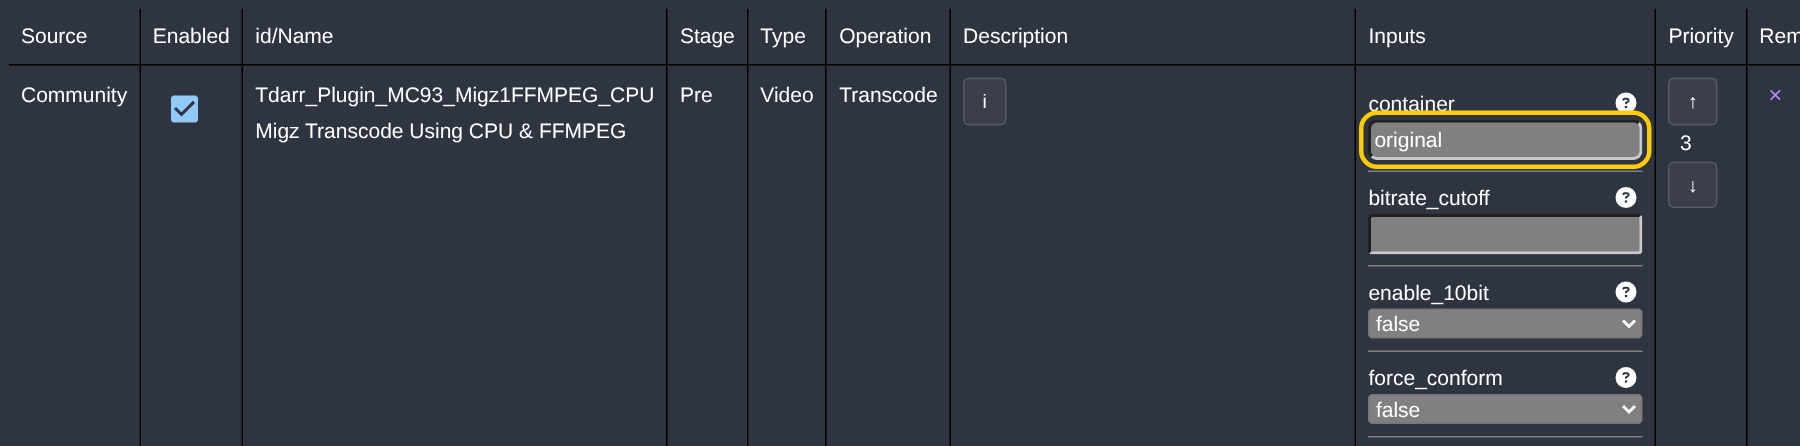
Make one change: double-click the transcode plugin and set container to original. The default is mkv, which renames every .mp4 to .mkv and confuses Radarr and Sonarr. With original, each file keeps its name.
- NVIDIA card: in the same window, untick Enabled on Migz Transcode Using CPU & FFMPEG. Then double-click Migz Transcode Using Nvidia GPU & FFMPEG, tick Enabled and set its container to
originaltoo. - Intel Quick Sync: the default stack has no Intel plugin. Untick the CPU plugin and drag Boosh-Transcode Using QSV GPU & FFMPEG in from the Community list on the right. I haven’t tested this one on Intel hardware.
Step 4: Scan the library
Still on the library, click its green Options button and choose Scan (Find new). Tdarr reads every file and adds anything that needs work to the queue. Files that are already HEVC are marked Not required and left alone.
Step 5: Start a worker
Nothing happens yet, because Tdarr starts with zero workers.
- Go to Home. In the Nodes box, click MyInternalNode.
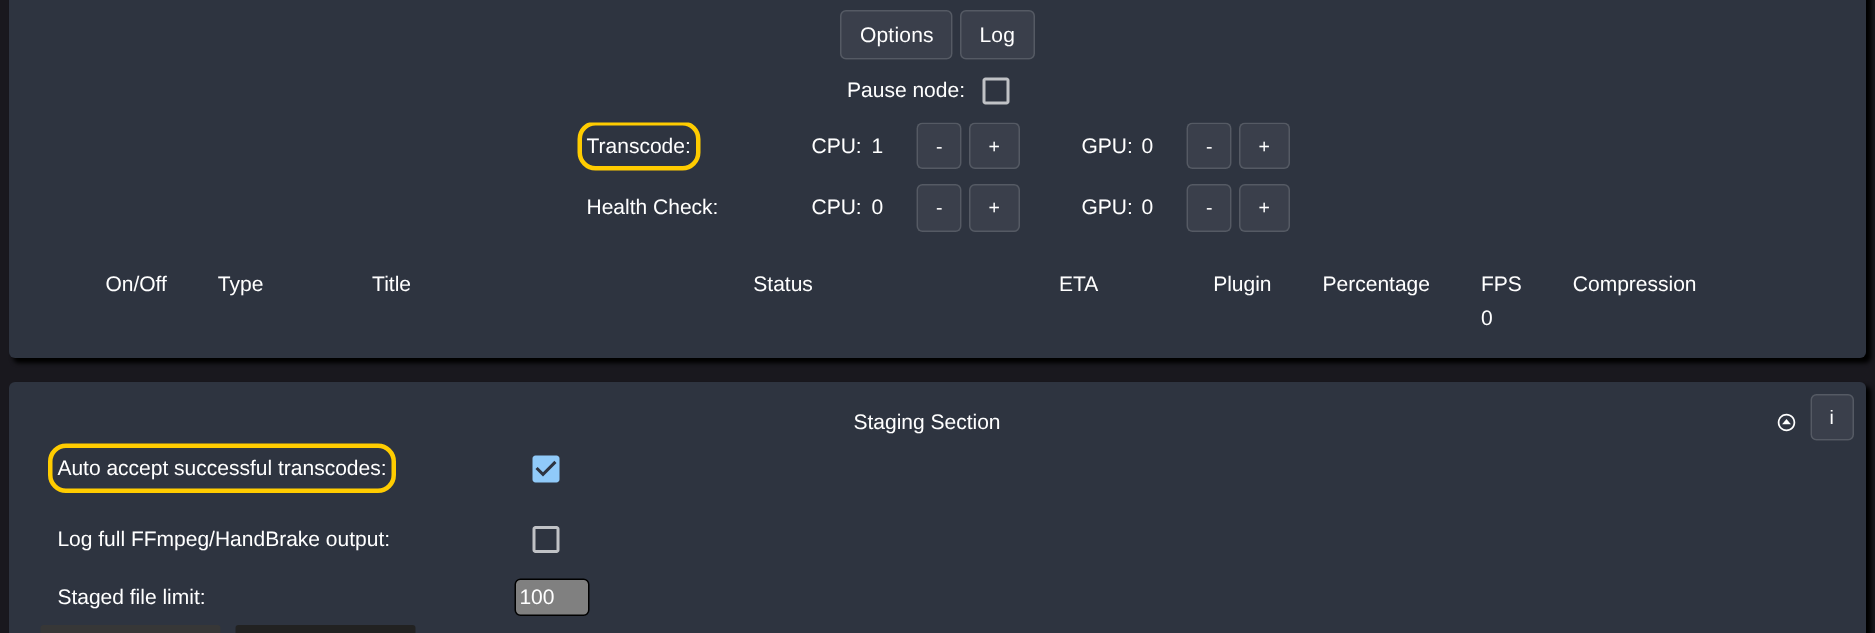
- Next to Transcode, press + once: by CPU for the CPU plugin, or by GPU for NVIDIA or Intel. One worker is plenty to start with.
- Scroll down to Staging Section and tick Auto accept successful transcodes. Without it, every finished file waits for you to approve it by hand.
Step 6: Check the results
Within a minute the worker starts on the first file. When files finish, open the Transcode: Success/Not Required tab at the bottom of Home to see the old and new sizes. In a test, two 1080p films went from 29.0 MB to 14.2 MB and 19.5 MB to 9.6 MB: just under half.

Play one or two of the new files in Plex before you add more. Happy? Then add your TV shows: on the Movies library click Options → Duplicate library, rename the copy TV and change its source to /data/media/tv.
That’s it. 🎉 From now on, new downloads get converted as they arrive, and Tdarr keeps working through the rest in the background.
Optional: health checks
Tdarr can also check files for corruption. On the node, press + next to Health Check → CPU. Broken files show up under Health Check: Error/Cancelled on the Home page, so you can delete them and let Radarr or Sonarr grab them again.
If something’s wrong
- Nothing is happening. Check the node has at least one transcode worker (Step 5), and that you scanned the library (Step 4).
- Finished files aren’t replacing the originals. They’re waiting under Staged Files. Tick Auto accept successful transcodes.
- “New file size not within limits”. That’s the safety check: the new file was under 40% or over 110% of the original, so Tdarr kept your original. It’s common with small, low-bitrate files, which don’t need shrinking anyway. Nothing is lost.
- Your disk is filling up, not emptying. You’re transcoding files that are still seeding. See the seeding box in Step 2.
- NVIDIA transcodes fail. Run
docker run --rm --gpus all ubuntu nvidia-smi. If that fails, install the NVIDIA Container Toolkit on the host, thendocker compose up -dagain. - Errors about the cache. The cache folder is full or not writable. Give it more space and run the
chownline from the Commands tab again.
Updating Tdarr
cd ~/tdarr
docker compose pull && docker compose up -d
Frequently asked questions
Does Tdarr reduce quality?
Transcoding is lossy, and Tdarr replaces your originals. At the settings in this guide the loss is hard to spot, but it can't be undone, so start with one small library and check a few files first.
How much space does Tdarr save?
Converting H.264 to H.265 (HEVC) usually makes files about half the size.
What does "New file size not within limits" mean?
It's a safety check: the new file was under 40% or over 110% of the original, so Tdarr kept your original. Nothing is lost.
Why is my disk filling up instead of emptying?
You're transcoding files that are still seeding, so both copies stay. Leave seeding files out of the library, as in Step 2.
Thank you
Tdarr is made by HaveAGitGat. It’s free to use, and a paid Pro tier adds extras you don’t need for this guide. Thanks also to Migz and the community for the plugins in the default stack.
Related guides: Radarr · Sonarr · Plex · Jellyfin · qBittorrent
If this guide helped you, consider buying me a coffee. It helps keep guides like this one coming.
Get new guides by email
About one email a month: new step-by-step guides and card releases. No spam, unsubscribe any time.